Campagnolo Freehub (Wahoo)

WFKICKRCAM2

'18, '20 Edition KICKR and KICKR CORE with most* Campagnolo 10, 11, and 12 speed cassettes.

We have less than 5 of these products in stock. In case of delivery in person we can put the product aside. In case of postal delivery we send the parcel the next working day.
SPECS

TECHNICAL DETAILS

BRAND
WAHOO
BRAND
USA
Made in
China
Year of manufacture
2018
Guarantee or warranty ( for person )
1 year
Guarantee or Warranty (for company)
1 year

Technical specifications

Release date
2018
Description

Installing the Campagnolo Freehub on KICKR v5, '18, or CORE

IMPORTANT: This page covers installation of the Campagnolo Freehub on KICKR v5, KICKR '18, and KICKR CORE.

KICKR v5, '18 & CORE Campagnolo Freehub Compatibility
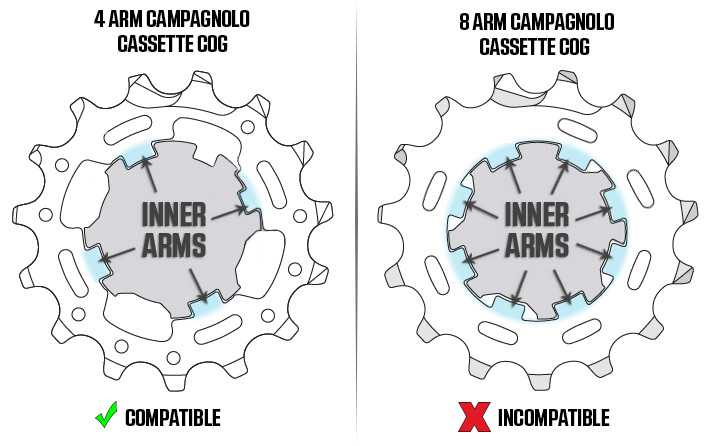
  • The KICKR v5, '18, & KICKR CORE Campagnolo Freehub is compatible with both Campagnolo, SRAM, and Shimano cassettes made in 2010 or newer
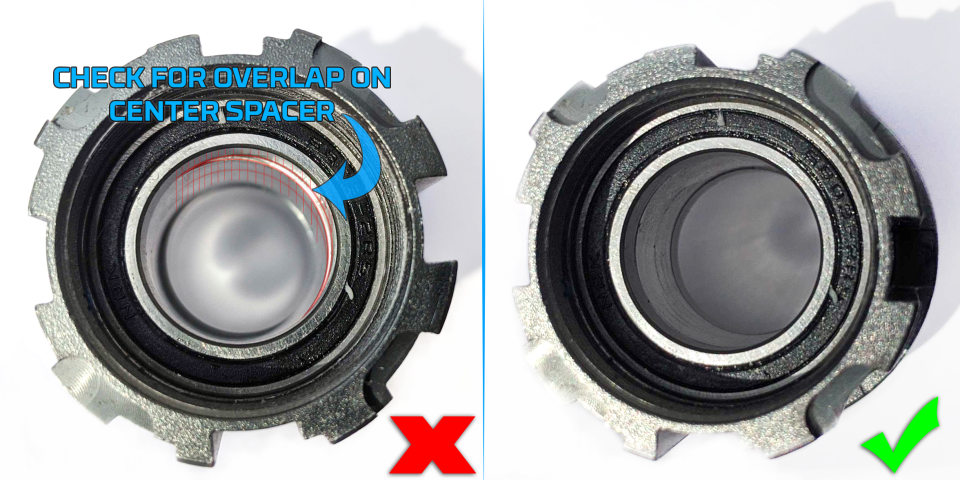
  • Campagnolo cassettes with 8 inner arms on any cog (except the last/outer/smallest cog) are NOT compatible (see image below)

Installation on KICKR v5, '18, & CORE

Required Tools:

  • Sprocket remover (AKA chain whip) or chain vice (as pictured in instructions below)
  • 17mm cone wrench or crescent wrench (adjustable wrench also acceptable)
  • Cassette lockring tool (we recommend either the Park Tool FR-5.2 or similar, or Park Tool BBT-5/FR-11 if using the Campagnolo lockring which came with your cassette - see note below next image for details) and matching 1" (25.4 mm) socket wrench or adjustable wrench

Notes:

  • The Campy freehub supports Campagnolo, Shimano, and SRAM cassettes, but included spacers are not needed with Campagnolo cassettes.
  • For your convenience, the included lockrings are geared for use with Shimano/SRAM lockring tools like the Park Tool FR-5.2.
  • Alternatively, you may use the lockring included with your cassette (both Shimano/SRAM and Campy compatible lockrings are supported).

Installation Steps:

1. Start by using the chain whip (or chain vice, as pictured) and lockring tool to loosen the lockring and remove the existing cassette (skip this step if a cassette is not present, like in KICKR CORE initial setup).
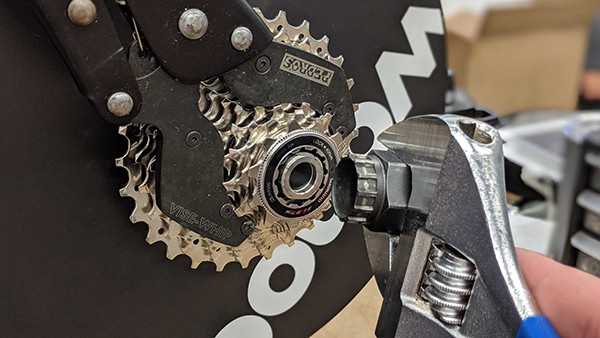
2. Use the 17mm cone wrench to remove the existing original lock nut and freehub body. Hold the pulley with your free hand for stability.
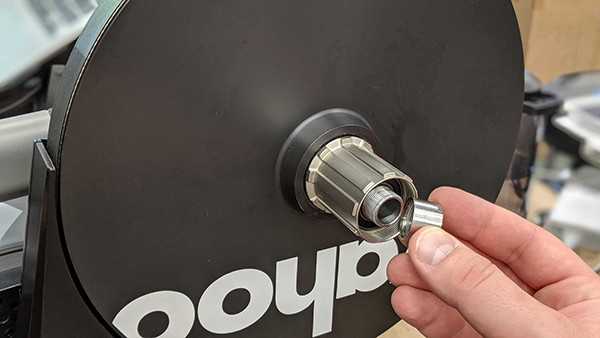
3. Install the inner spacer. You can use either the spacer contained in the Campagnolo freehub (ships on the inside of the side with the pawls) or the original inner spacer. While cosmetically different (the Campy freehub's is shiny), they remain mechanically identical. Do not use both.
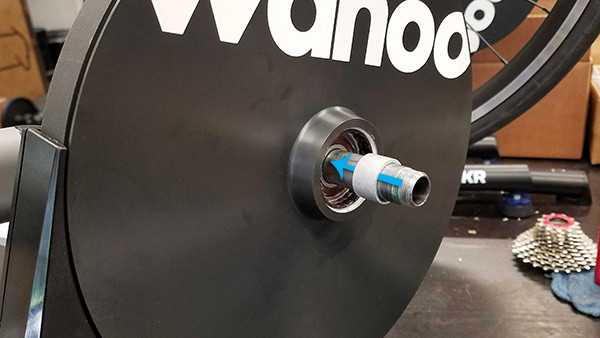
 

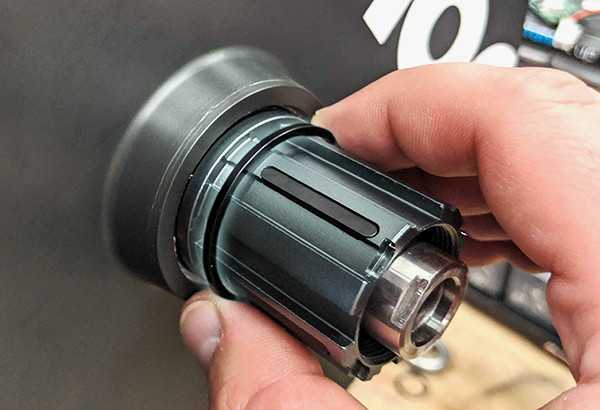
4. Check the center of the Campagnolo freehub for any overhang on the captive inner spacer. Adjust this spacer by hand to ensure it's flush all around, as shown below:
 

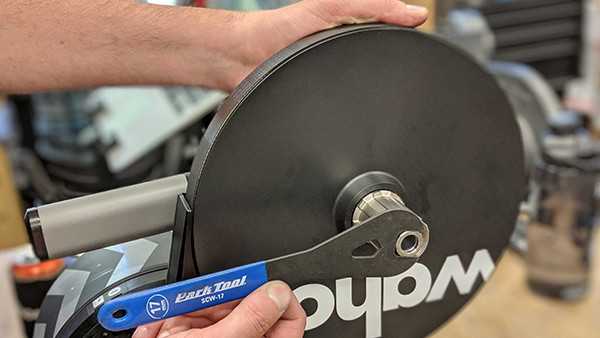
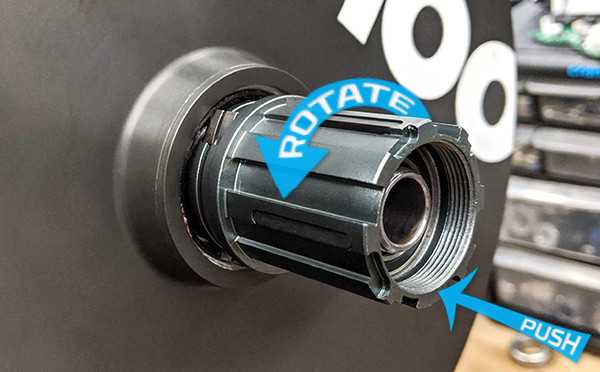
5. Install the new Campagnolo freehub over the inner spacer, rotating counterclockwise (in the direction of the pawls) until flush against the pulley.
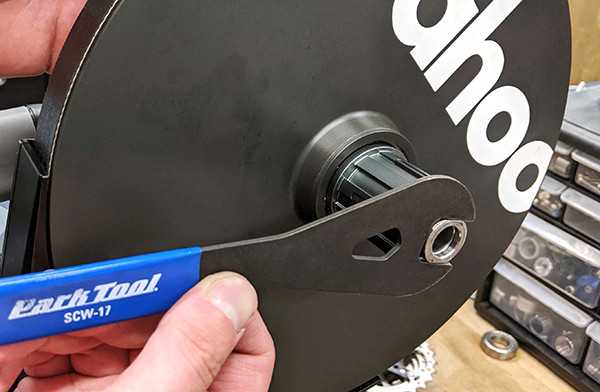
6. Screw on the original lock nut and tighten with the 17mm cone wrench, again holding the pulley with your other hand for stability. Tighten until snug, being sure to avoid applying excessive force.
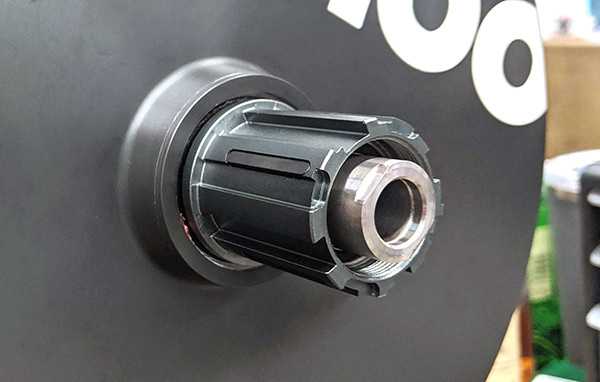
7. Install the included spacer as needed for your cassette, along with any other spacers which came included with the cassette.
Accessories

Product accessories

Wahoo Kickr Core Smart Trainer

The essential indoor smart trainer. The KICKR CORE is the latest in Wahoo's line of smart indoor bik...

Wahoo Kickr Snap Smart Bike Trainer

The Wahoo KICKR SNAP makes indoor training a "snap!" It's a convenient, easy to set-up wheel-on smar...

Wahoo KICKR Smart Trainer new (V6, 2022)

With the addition of lightning fast WiFi, KICKR continues to stay ahead of the pack as the smart tra...

Wahoo Kickr MOVE SmartTrainer

With the introduction of fore-aft motion, the KICKR MOVE bike trainer allows your bike to move natur...